One of Hostinger’s lesser-known—but truly fantastic—features is the ability to spin up a WordPress site on Hostinger without a domain on a temporary (dummy) domain. This makes life much easier when you’re:
- developing a proof-of-concept
- showing a design mock-up to a client
- testing plugins, themes, or AI site builders in a sandbox
Below is a concise, beginner-friendly walkthrough that takes you from logging in to celebrating your brand-new WordPress installation—all without attaching a real domain.
Table of Contents
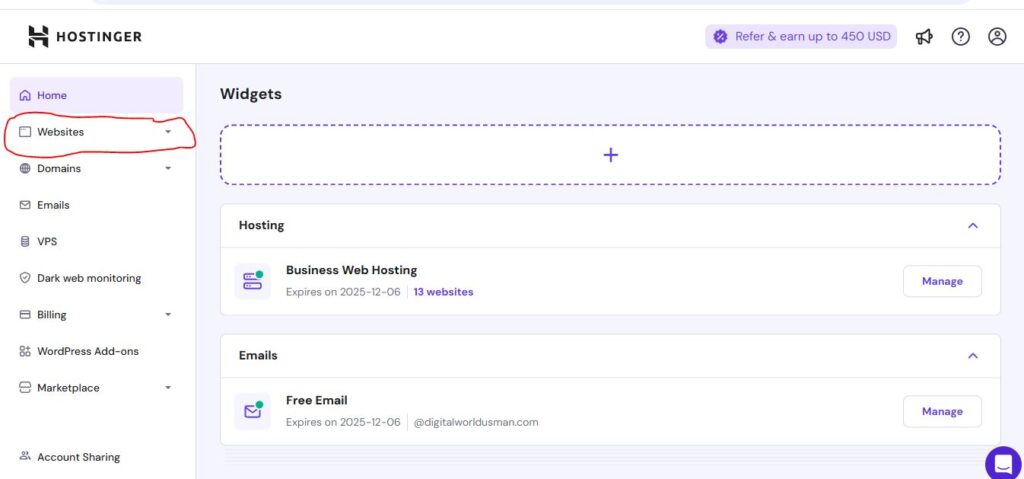
1 . Log in and open your Website list
- Sign in to your Hostinger dashboard.
- In the left-hand sidebar, select Hosting → Websites.
- The Website List screen shows every site connected to your current plan.
2. Click + Add Website
- In the upper-right corner, hit + Add Website.
- A drop-down menu appears with several one-click installers. Choose WordPress (you can apply the same flow to other CMSs later).

3 . Create your WordPress credentials
- Enter the admin e-mail you want for WordPress.
- Generate a strong password—you’ll need it to log in
/wp‑admin - Click Next.
4 . Pick your build method
Hostinger gives you three paths:
| Option | Best For | Key Point |
|---|---|---|
| Create a Website with AI | Rapid scaffolding | Start from an industry-specific starter site (portfolio, e-commerce, blog, etc.). |
| Start from an industry-specific starter site (portfolio, e-commerce, blog, etc.). | Describe the site, features, and design you want. Hostinger’s AI drafts a layout automatically. | Start from an industry‑specific starter site (portfolio, e‑commerce, blog, etc.). |
| Create Blank Site | Full control | Begin with a clean WordPress install—no demo content, no extra plugins. |
If you want an entirely custom build (or prefer installing your theme later), choose Create Blank Site and click Next.
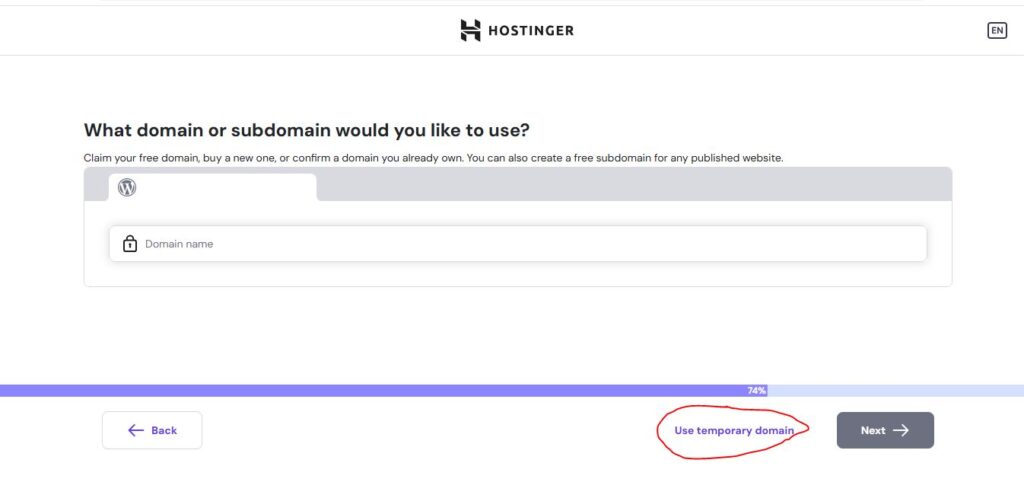
5. Select Use Temporary Domain for WordPress Site on Hostinger Without a Domain
On the domain-selection screen, you’ll see two choices:
- Add Existing Domain—for projects that already own a URL.
- Use Temporary Domain—our focus for this tutorial.
Click Use Temporary Domain and press Next. Hostinger now:
- provisions a random subdomain (e.g.,
your‑site‑12345.myhostinger.site) - installs WordPress behind the scenes
The process usually finishes within one or two minutes.
6. That’s It—WordPress Is Live!
Navigate back to Hosting → Websites, and you’ll find your temporary domain in the list. From there, you can:
- Click Edit to open the WordPress Dashboard
- Start installing themes, plugins, and content
- Share the URL with clients for instant feedback
When you’re ready to point a real domain (whether purchased through Hostinger or elsewhere), return to the same screen, choose Add Domain, and perform a simple swap—no need to touch your WordPress files.
7- WordPress Site on Hostinger Without a Domain
Launch a full WordPress website on Hostinger instantly—no domain purchase required.
Use Hostinger’s built-in temporary domain to showcase demos or client mock-ups risk-free.
Install WordPress in minutes with one-click setup and a random subdomain (e.g., website.myhostinger.site).
Perfect for staging, testing themes and plugins, or refining designs before you point to a real URL.
When you’re ready, swap in your permanent domain with zero downtime—seamless and painless.
Conclusion
Hostinger’s temporary domain feature, WordPress Site on Hostinger Without a Domain, is a game-changer for web developers who frequently need disposable or preview sites. It saves money, accelerates client sign-off, and keeps your primary domains uncluttered. So the next time you need a quick demo or staging environment, skip the domain-purchase step and let Hostinger handle the heavy lifting. Happy building!